As garden beds are being put away and colder temperatures are keeping us indoors, it’s the perfect time of year to try your hands at homemade bread. I’ve been hesitant to share my whole wheat sprouted bread recipe as their are 3 factors involved when it comes to baking bread.
- The temperature in your house
- The humidity in your house
- The type of flour being used (store bought versus freshly milled)
These 3 factors can alter the recipe a bit. This is why each baker in each home will have to customize and work around the base recipe keeping this in mind.
What I would like to encourage you is to practice, practice, practice. With the slower days coming ahead I’m looking forward to trying artisanal sourdough boules, baguettes and paines. Yes, baking bread can become enjoyable and therapeutic. It’s really true what you hear. There is nothing like homemade baked bread.
Diana’s Whole Wheat Sprouted Bread
I use freshly milled sprouted flour, made from sprouted wheat berries. Click here for a tutorial on sprouting grains. Freshly milled whole grains end up being lighter in weight, flavor and has considerable more nutrients. (This recipe works just as well with regular unsprouted flour)
Ingredients:
- 5 tsp, regular active dry yeast
- 1/4 cup warm water
- 1/2 cup raw honey
- 1/4 cup butter
- 3 tsp celtic sea salt
- 2 cups hot water
- 27oz whole wheat sprouted flour (hard red wheat), (4 1/2 cups whole wheat flour)
- 10oz + whole wheat sprouted pastry flour (soft white wheat), 1 1/2 cups +
Method:
Sprout wheat berries and grind. Alternatively, buy sprouted whole wheat flour or use regular unsprouted flour.


In a small bowl, dissolve yeast in warm water.

In a large bowl, mix honey, butter and salt in the hot water. Let this stand and cool for five minutes.

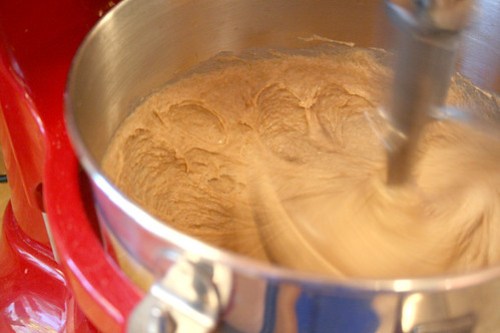
To the cooled honey mixture, beat in 18oz or 3 cups of the whole wheat flour with the mixer on low speed until moistened, scraping the bowl frequently. Beat on medium speed for 3 minutes.
Beat in remaining 9oz or 1 1/2 cups whole wheat flour and the dissolved yeast. Mix in 10oz of the whole wheat pastry flour (soft white wheat) and knead in with your hand or a spoon until everything is incorporated.
REST FOR 10 MINUTES
This step is very important as it allows the gluten in the whole wheat to begin to expand. If you skip this step you will end up adding too much flour in the following steps creating a dry, crumbly, dense bread.

With the dough attachment set on low, knead for 8-10 minutes. If your dough is sticking to the sides of the bowl after 3 minutes, add 1 tbls at a time extra whole wheat pastry flour until it forms a ball without sticking to the bowl.
One of the things I’d like to stress…. your dough should still be tacky, sticky, soft and pliable. Adding too much flour will make a crumbly bread. So don’t overdo it.

Once the dough has finished kneading, remove from the bowl. Shape it into a ball by pulling it down into a nice firm shape. Place in an oiled bowl and brush olive oil over the dough as well.

Cover loosely with plastic wrap and a cloth towel. Place in a warm place to rise for 45 minutes or until doubled in size. (This phase will depend on the temperature and humidity in your house)

Once doubled, it’s time to shape your loaves.

I’ve prepared a video to show you my technique.
Once you’ve shaped your loaves, allow to rest for 45 minutes or until doubled in size.

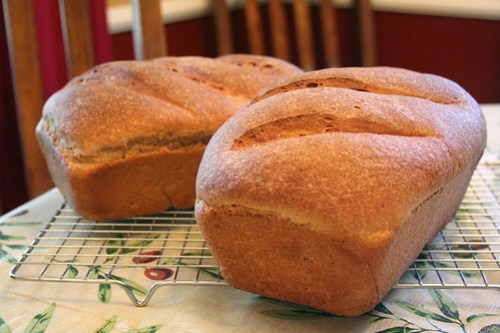
Heat oven to 375 degrees. Uncover and bake loaves for 30 minutes. Reduce the oven temperature to 350 degrees and bake an additional 10 – 12 minutes or until loaves sound hollow when lightly tapped. Immediately remove from pans; place on wire racks and cool for 30 minutes to an hour.


Once you start making bread, this process begins to become familiar and you’ll intuitively know by the feel and touch of your dough if you’ve added too much flour or not enough. It takes practice but the final results are worth it. If you have any questions at all, please don’t hesitate to ask. I’m not claiming to be an expert bread maker, I still have a lot of learning to do, but my family is quite happy with our home baked sandwich bread.
Best wishes on your bread making endeavors.
This post is a part of Whole Foods for the Holidays – Bread Dishes and Simple Lives Thursday


very instructional! loved learning about the roll and tuck technique. Will be implementing it on my next bread making.
(The kids in the background are so cute…that's how my kitchen sounds too!!!)
What a marvelous tutorial! The bread looks absolutely perfect! I have yet to maser the lovely looking sliced-tops like you have here, but I suppose practice makes perfect! Thank you so much for hosting the Whole Foods for the Holidays 🙂
I'm trying the bread right now, thanks for sharing. I might have missed it – but I didn't see butter in the ingredient list, but then it's in the instructions. How much? THANKS!
Oops.. thanks for pointing that out! 1/4 cup butter! I'll add that in right now 😉 let me know how it turns out 😀
Diana,
Have you ever tried this recipe in a bread machine?
That picture is cool mama.
Interesting! I prefer using scalded milk when baking with sprouted grains, as water doesn't turn out well for me. But yours looks delicious. I might have to try it, as my sprouted yeasted breads are only just starting to turn out for me. Hmm. Thanks!
That is some beautiful bread.
Beautiful Bread. I have some sprouted flour waiting to be used. This recipe will do the trick.
Great tutorial.
Mely
You make it look so easy!!!!
Beautiful looking loaf of bread. The advice to keep the dough on the sticky side is good, I overdid it with the flour once and I won't make that mistake again…I hope.
-Brenda
Gorgeous. I know sprouted grain breads are known to be tricky — but your instructions make it look easy! Thanks for sharing all your wisdom — and encouragement.
wow what a perfect loaf of bread
Bread is something that I can't bake well at all….Its a real tedious process to me.I never seem to get it right.
how long do you sprout your wheat? how do you grind it? I've haven't had much luck with sprouted wheat bread. thanks in advance for your advice.
Hi Amber. It really depends on the temperature for sprouting time. Anywhere from 1 to 2 days. I don't let the sprout get to big. Usually a small bump and then I dehydrate them. To grind them I have a Nutri Mill grain grinder. I absolutely love it!! Check out my other post on sprouting whole grains. I go into more detail on the process.
http://spaininiowa.blogspot.com/2010/02/sprouting-whole-grains.html
Best wishes and let me know how it goes 😀
fantastico Diana!. I´ve been looking for a good sprouted bread recipe for months…
Wow! That looks so good! I think I will give it a try! I don’t have any soft wheat, only hard. Is it ok to use all hard wheat in this recipe instead of using some pastry flour? Also, do you know if this recipe would work with sprouted spelt flour?
Hi,
I love your bread. It is beautiful. I have NEVER made bread. I have made corn bread & biscuits. I would like an easy reacipe if you could suggest one.
Thanks & have a Blessed day,
Brandy
Now that you are soaking your flour, do you soak it for this recipe, now, too? I had never heard of soaking grains, so I’m very new to how it works. Thanks!
Amy, I don’t soak my flours. There’s been quite a bit of research that shows soaking flour in a lactic acid medium really doesn’t lower the pytic acid. The only thing that really does is sourdough. So, I’ve been diving into that. However, I still make this bread recipe all the time without sprouting or soaking. Just using freshly milled flour.
So you aren’t soaking your flours anymore even in the other recipes you’ve posted that have “soaked” in the name? Just want to make sure that I understand. Also, did a bit more research on that myself and found that sprouting is a form of soaking, just without the fermentation. 🙂
Amy, I don’t soak. I also used to think that sprouting was a better option to neutralize phytates. According to Vintage Remedies, it doesn’t do the job either. The best route is sourdough. A true form of fermentation.
Diana,I am so happy to have found your blog!
I made your lovely bread tonight and it turned out so delicious! I didn’t mill the wheat flour my self but I was able to find a Whole wheat Sprouted flour and whole wheat pastry flour at my local Whole Foods store.
Your instructions and videos are great! Can’t wait to mill my own flour soon!
Hint* Hint* Any chance you will post whole wheat baguette recipe? Thank you again!!!
Thanks, Tini! I’ll have to post it soon!
Hey Diana!
I am so happy with how this recipe worked for me!!!
Quick question, how do you store it? Refrigerator? Counter? Have you ever frozen it for later use?
Jackie. I keep one loaf out and the other in the freezer, both wrapped in sandwich bags. To defrost, I take it out of the bag and place it on my counter on top of a cookie drying rack. Thanks Jackie!
The link to sprouting doesn’t work. Or rather it goes to a blank page.
Foy
This bread looks yummy but I just ran out of honey, can I use sugar instead and if so would I use the same amount (1/4 c.)?
Jiji, yes, you can definitely sub sugar. I would keep it the same and see how that turns out 😉
Hi Diana,
I’ve already made this bread several times and it is hands down the best whole wheat bread I’ve ever made. The instructional video for shaping the bread was great! Thanks for another great recipe.
Jen
I’m so glad to hear that, Jen. Thanks for sharing!
Hi Diana,
I am trying you bread for the first time and it is baking right now and it smells wonderful. But I do have one question: It raised beautiful but How do you keep you bread from dropping during baking?
This is my only big problem.
Thank you,
Sandra
Hi there. I want to try your bread recipe. I am a little confused on the amounts if wheat berries I need to sprout in order to end up with the right amount of flour. Can you simplify this for me? Thx!
Hello
I would love to make home made healthy bread every week but I wonder what the cost per loaf comes to? How many standard size loafs does this make?
I plan on buying a package of sprouted whole wheat flour to use.
What size loaf pan do you use?
I use the stoneware loaf pan by Pampered Chef. It’s 9″ x 5″.
Hi
I make my breads by weight and I noticed that you have 4.5 cups flour listed at 27 oz but according to KA website one cup of flour is 4 oz so 4.5 cups would be 18 oz, not 27 and 1.5 cups would be 6 oz, not 10 oz. Should I follow your volume measurements of the weight ones. 🙂
Thanks, lauren